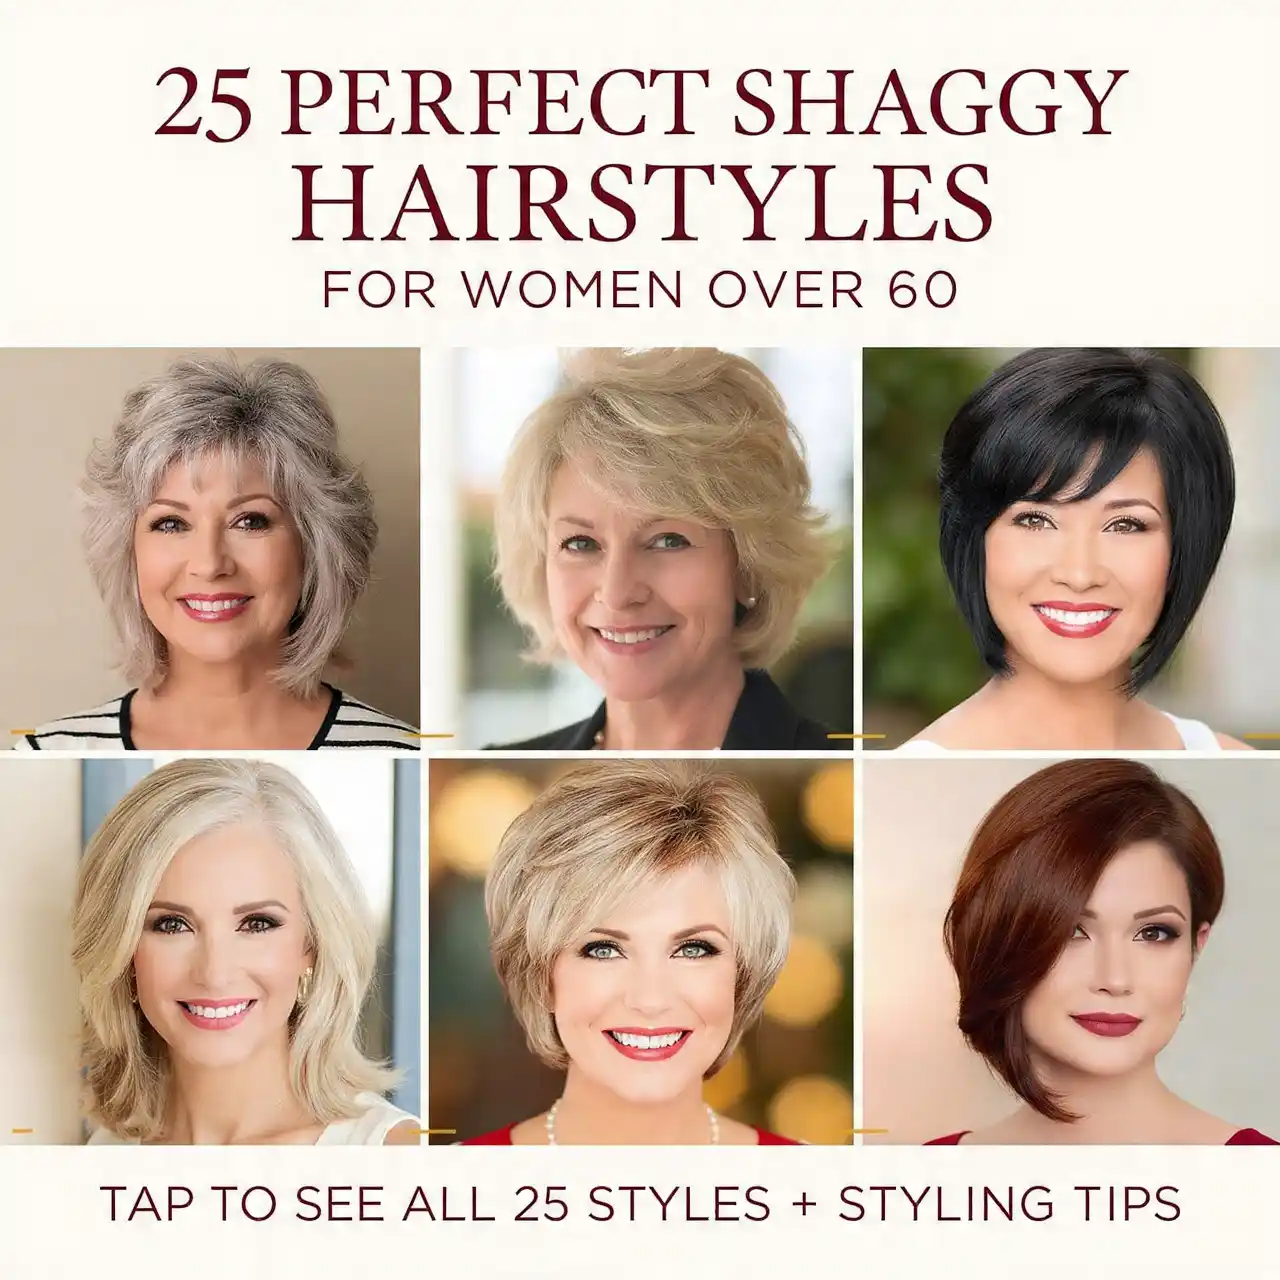
25 Perfect Medium Shaggy Hairstyles for Women Over 60: Your Ultimate Style Transformation Guide
After styling hair for over 15 years, I’ve watched the shaggy haircut evolve from a rebellious 70s trend into the most flattering, age-defying style for women over 60. Let me share something remarkable: last month, three of my clients in their sixties walked out of my salon looking ten years younger, and they all chose variations of the medium shaggy cut.
Here’s what nobody tells you about aging gracefully—the right haircut does more for your appearance than any expensive cream or treatment. And the medium shaggy hairstyle? It’s pure magic for mature women.
Why Medium Shaggy Hairstyles Are Revolutionary for Women Over 60
Let me be honest with you. When hair starts thinning and texture changes after sixty, most women panic and cut everything short. I’ve seen it hundreds of times. But here’s the secret professionals know: medium-length shaggy cuts actually create the illusion of thicker, fuller hair while maintaining sophisticated elegance.
The beauty of shaggy layers lies in their strategic placement. Unlike blunt cuts that expose thinning areas, or super-short styles that can feel harsh against mature skin, the medium shag works with your hair’s natural movement. Each layer adds dimension, bounce, and that coveted youthful volume.
💡 PRO TIP: Medium length hits the sweet spot between shoulder and collarbone—long enough to feel feminine and versatile, short enough to stay manageable and modern.
The Science Behind Why Shaggy Cuts Work Beautifully After 60
Your hair changes significantly in your sixties. The diameter of each strand decreases, growth slows down, and you might notice different textures emerging. I’ve studied these changes extensively, and shaggy cuts are specifically designed to address them.
The multiple layers in a shag create optical density. When light hits those varied lengths, it creates shadows and highlights that make hair appear substantially thicker. Additionally, the choppy, textured ends prevent that thin, wispy look that plagues many mature women with one-length cuts.
Movement is another crucial factor. Static hair looks lifeless and emphasizes age. Shaggy layers introduce dynamic movement that draws the eye and creates vitality. It’s essentially a youthful energy captured in a haircut.
25 Stunning Medium Shaggy Hairstyles That’ll Transform Your Look
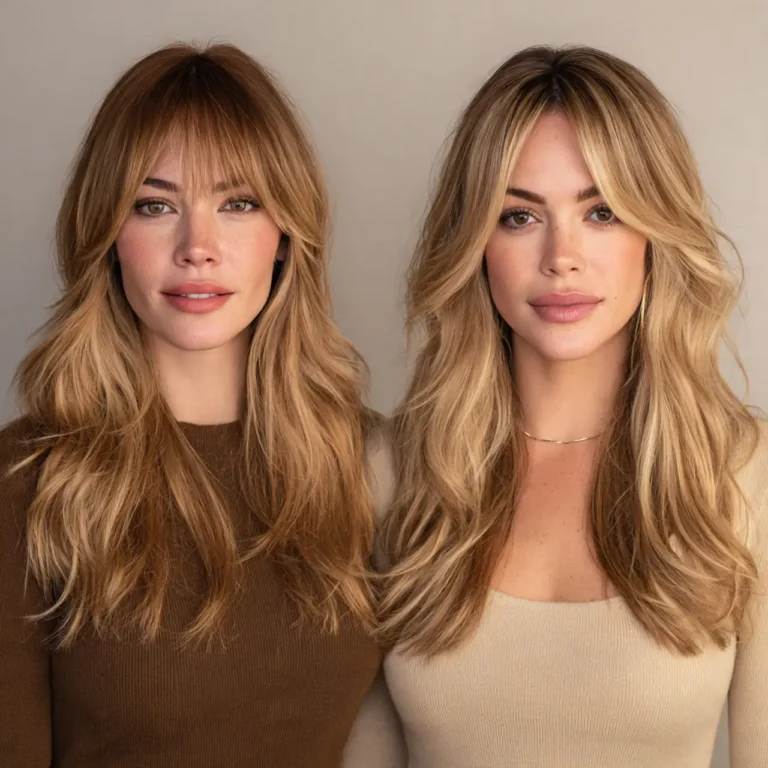
1. The Classic Feathered Shag
This timeless style features soft, feathered layers that frame the face beautifully. The key is keeping the layers graduated from shorter around the crown to longer at the bottom, creating that signature feathered effect.
I recommend this for women with fine to medium hair texture. The feathering technique removes weight without sacrificing fullness, and it works wonderfully with both straight and wavy hair.
⚠️ STYLING TRUTH: Use a round brush while blow-drying, rolling the brush away from your face to achieve that perfect feathered flip.
Image Placement #1 – “Classic Feathered Shag on Mature Woman”
2. The Voluminous Crown Shag
Here’s where we get strategic about combating flat hair. This variation concentrates shorter layers at the crown, creating magnificent lift where women over sixty need it most.
I’ve perfected this technique over years of working with mature clients. The shorter top layers stand up naturally, while longer pieces around the face remain soft and flattering. It’s particularly stunning on women with naturally straight or slightly wavy hair.
✨ EXPERT SECRET: Ask your stylist to use a razor for the crown layers—it creates softer, more natural-looking texture than scissors alone.
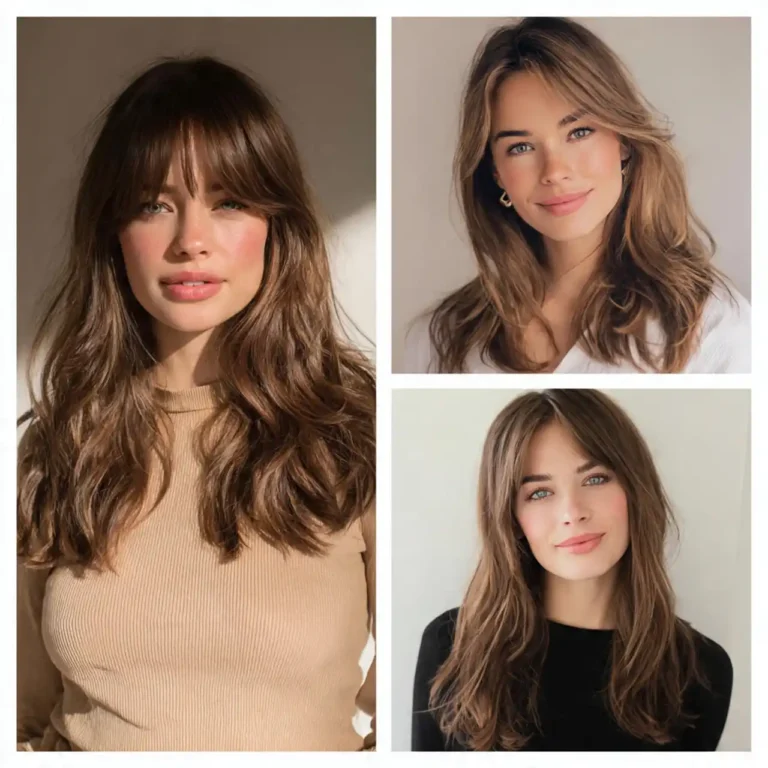
3. Side-Swept Shag with Long Bangs
This style is absolutely transformative for women with prominent foreheads or those wanting to soften facial features. The side-swept element adds asymmetry, which is incredibly youthful and modern.
Long, piecey bangs blend seamlessly into the shaggy layers, creating one cohesive, flowing style. I always cut the bangs to fall just below the eyebrow, long enough to sweep aside but substantial enough to frame the face.
💰 BUDGET WIN: This style grows out beautifully, meaning you can stretch salon visits to 8-10 weeks without looking unkempt.
Image Placement #2 – “Side-Swept Shag with Bangs Over 60”
4. The Textured Choppy Shag
For my bolder clients who want edge without going too alternative, this is the answer. Choppy layers throughout create incredible texture and dimension while maintaining sophistication.
The “choppy” refers to the disconnected layers—they don’t blend smoothly but instead create distinct, piece-y sections. This technique is phenomenal for adding body to fine hair and removing bulk from thick hair.
🎯 PERFECT FOR: Women with straight to wavy hair who want wash-and-go convenience with maximum style impact.
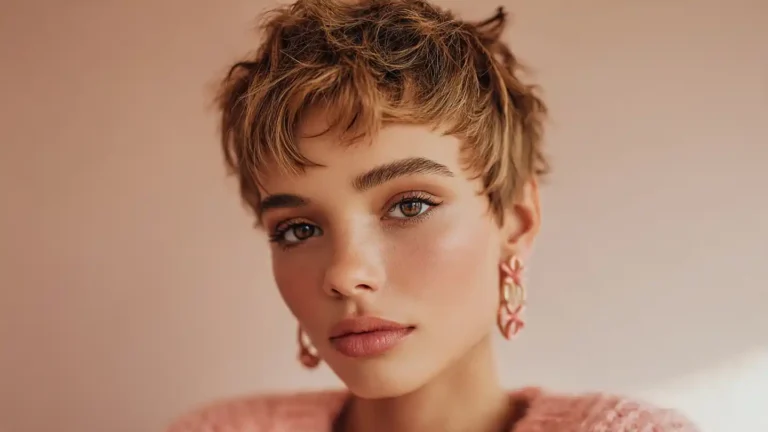
5. Soft Layered Shag for Fine Hair
I specifically designed this variation for clients with thinning hair who worry about looking “stringy.” The layers are cut at subtle angles that create the appearance of density without removing too much length.
The magic is in the layering pattern. Instead of heavy, obvious layers, these are whisper-soft gradations that add movement without creating gaps. Combined with the right highlighting technique, this creates dimension that makes hair look remarkably fuller.
Image Placement #3 – “Soft Layered Shag Fine Hair Over 60”
6. The Shaggy Lob (Long Bob)
Technically hitting right at the collarbone, this style bridges the gap between bob and medium length. It’s incredibly versatile and universally flattering.
What makes this work so well for mature women is the shaggy texture throughout. A traditional lob can look too severe, too geometric. Adding those choppy, irregular layers softens everything while adding contemporary appeal.
💡 GAME CHANGER: This length is perfect for tucking behind ears to show off statement earrings—instant elegance.
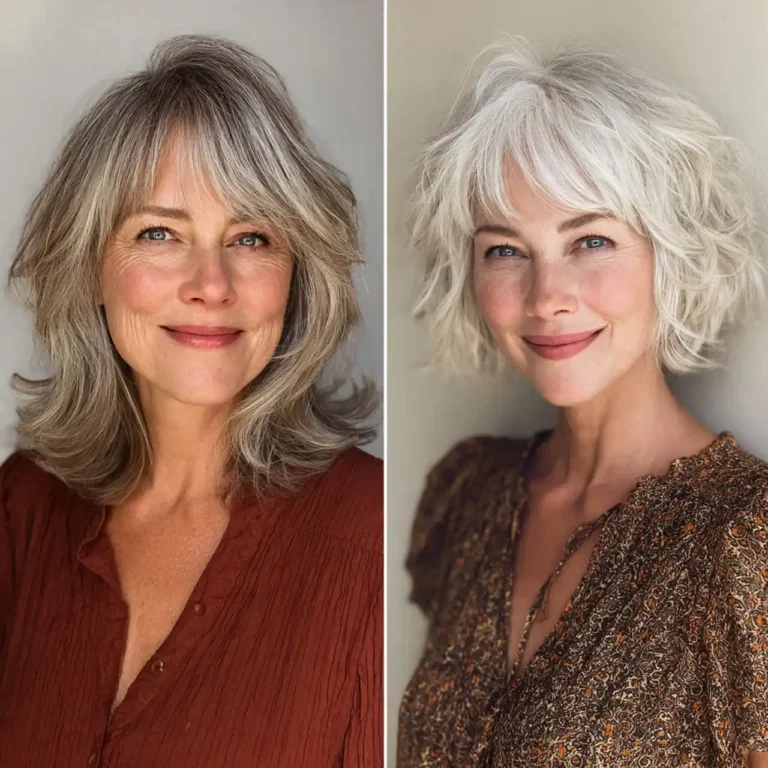
7. Shag with Curtain Bangs
Curtain bangs have made a massive comeback, and for good reason. They’re the most flattering bang style for mature faces, parting gently in the middle and framing both sides of the face.
When combined with a medium shag, curtain bangs create a cohesive, face-framing masterpiece. I cut them longer in the center (nose-length) and gradually shorter toward the sides where they blend into the layers.
⏰ TIME SAVER: Curtain bangs are the lowest-maintenance bang option—they look intentional even when growing out.
Image Placement #4 – “Shag with Curtain Bangs Mature Women”
8. The Modern Shag with Razored Ends
Razor cutting creates the softest, most natural-looking texture. For women over sixty, this technique is particularly flattering because it avoids the blunt, harsh lines that can age the face.
I use the razor on the bottom third of the hair, creating wispy, feathered ends that move beautifully. The upper layers are scissor-cut for structure, while the razored ends provide that effortless, lived-in finish.
9. Voluminous Wavy Shag
If you have natural wave or curl, this style celebrates it. The shag cut enhances your hair’s natural texture while keeping it manageable and shaped.
The layers are cut to encourage the wave pattern, creating gorgeous, voluminous spirals that look intentional, never frizzy. I’ve seen this style transform women who’ve fought their natural texture for decades.
✨ THE SECRET: Use a curl-enhancing mousse on damp hair, scrunch gently, and air-dry. The layers do all the work.
Image Placement #5 – “Wavy Shag Hairstyle Women Over 60”
10. Face-Framing Shag
This technique focuses the shortest layers specifically around the face, creating a beautiful frame that highlights your best features while softly concealing areas you’re less confident about.
I typically start the face-framing layers at cheekbone level, gradually increasing length as we move back. It’s incredibly flattering for all face shapes but especially stunning on oval and heart-shaped faces.
11. The Tousled Bedhead Shag
Don’t let the name fool you—this is controlled chaos at its finest. The tousled shag looks effortlessly undone but requires strategic cutting to achieve that perfectly imperfect texture.
Multiple short-to-medium layers throughout create natural volume and movement. When styled with texturizing products, it achieves that coveted “I woke up like this” vibe that’s sophisticated, never messy.
🎯 STYLING REALITY: This style actually looks better on day-two hair. Sleep on it, add some dry shampoo, tousle with your fingers, and you’re done.
Image Placement #6 – “Tousled Shag Hairstyle Over 60”
12. Sleek Shag with Blow-Dry Finish
For women who prefer polished elegance over tousled texture, the sleek shag delivers. The layers remain the same, but the styling creates smooth, flowing movement rather than piece-y texture.
I blow-dry this style with a large round brush, creating gentle bends rather than flips. The result is sophisticated, boardroom-ready, and absolutely timeless. It’s perfect for professional women who want style without sacrificing polish.
13. Shag with Wispy Bangs
Wispy, feathered bangs are incredibly forgiving and flattering for mature skin. Unlike blunt bangs that can look too heavy, wispy bangs create softness and hide forehead lines without making a bold statement.
These bangs are cut with a razor or point-cutting technique, creating fine, separated pieces that lay gently across the forehead. They blend seamlessly into the shaggy layers, creating one cohesive, flowing style.
💡 PRO INSIGHT: Wispy bangs require minimal styling—often just running your fingers through them is enough.
Image Placement #7 – “Wispy Bangs Shag Over 60”
14. The Disconnected Shag
This contemporary take features intentionally disconnected layers that create striking dimension. It’s more editorial, more fashion-forward, but still absolutely wearable for everyday life.
The “disconnection” means the layers don’t blend smoothly—there are noticeable differences in length that create visual interest. This technique is fantastic for adding drama and personality to your look.
15. Shag with Hidden Layers
For women who want volume and movement but worry about looking too “choppy,” hidden layers are the answer. The top layer remains relatively smooth and long, while interior layers create body and dimension you can feel but can’t obviously see.
This is my go-to technique for conservative clients transitioning from traditional styles. It introduces them to the benefits of shaggy texture without the dramatic visual change.
Image Placement #8 – “Hidden Layer Shag Mature Hair”
16. The Root-Lifted Shag
Volume at the roots is crucial for mature hair, and this cut is engineered specifically for maximum lift. Shorter layers at the crown naturally stand away from the scalp, creating fullness where it matters most.
I combine this cut with strategic highlighting at the roots—lighter pieces near the scalp create the optical illusion of even more volume. It’s a one-two punch that defeats flat hair completely.
⚠️ AVOID THIS MISTAKE: Don’t use heavy conditioner at your roots—it weighs down that crucial volume. Apply conditioner only from mid-length to ends.
17. Asymmetrical Medium Shag
Asymmetry is inherently youthful and dynamic. This variation features one side slightly longer than the other, or more layers concentrated on one side, creating beautiful imbalance.
I love this for women with strong, confident personalities who aren’t afraid to stand out. It’s particularly flattering if you have a preferred side for your part—we emphasize that side with more face-framing layers.
Image Placement #9 – “Asymmetrical Shag Over 60”
18. The Bouncy Shag with Curl
If you’ve always wanted more curl but nature gave you straight hair, this styled shag delivers. The layers are cut to maximize the curl created with styling tools, and the length prevents the dreaded triangle shape.
I typically curl this style with a medium-barrel curling iron, alternating curl directions for natural-looking bounce. The shaggy layers prevent it from looking too “done” or pageant-like.
19. Shag with Peekaboo Highlights
Strategic color placement takes your shag from great to extraordinary. Peekaboo highlights—lighter pieces hidden underneath that flash when hair moves—add depth and dimension that’s incredibly flattering.
I place these highlights in the interior layers, so they peek through when wind blows or when you turn your head. It creates intrigue and makes your hair look multidimensional and expensive.
💰 COLOR WISDOM: Peekaboo highlights require less frequent touch-ups than traditional highlights since regrowth is less obvious.
Image Placement #10 – “Shag with Highlights Over 60”
20. The Effortless Air-Dried Shag
This is cut specifically to look gorgeous with minimal styling. The layers are positioned to fall naturally when air-dried, creating casual, lived-in texture without heat tools.
For women tired of the blow-dryer routine, this is liberation. Apply leave-in conditioner to damp hair, scrunch gently, and let it dry naturally. The cut does absolutely all the work.
21. Shag with Tapered Ends
Instead of blunt or choppy ends, tapered ends gradually thin out, creating extremely soft, feminine movement. This technique is particularly beautiful for women with thick hair who want to remove bulk without losing length.
The taper is achieved through careful scissor work, graduating the hair thickness from thicker at the root to thinner at the ends. It creates beautiful swing and prevents that heavy, triangular shape.
Image Placement #11 – “Tapered Shag Haircut Over 60”
22. The Messy-Chic Shag
There’s sophisticated messiness, and then there’s just messy. This style is definitely the former—intentionally tousled texture that looks expensive and editorial.
Multiple short layers throughout create natural separation and piece-y texture. When styled with the right products (more on that later), it achieves that coveted “expensive haircut” look that turns heads.
✨ THE DIFFERENCE MAKER: Sea salt spray. It’s the secret to achieving this texture without looking unkempt.
23. Shag with Graduated Layers
Mathematical precision meets artistic styling in this variation. The layers are cut at specific, graduated intervals, creating a cascading effect that’s structured yet flowing.
This technique ensures even weight distribution, so you get volume where you want it without unexpected bulk elsewhere. It’s particularly good for women with very thick hair who’ve struggled with previous cuts looking bottom-heavy.
Image Placement #12 – “Graduated Layer Shag Over 60”
24. The Vintage-Inspired Shag
Taking cues from the iconic shags of the 70s but updated for modern sophistication, this style features dramatic layers and bold, face-framing pieces.
What makes it work for mature women is the refinement in the cutting technique. We keep the dramatic spirit of vintage shags while eliminating the aspects that could look dated. The result is nostalgic yet contemporary.
25. The Customized Personal Shag
Here’s what I’ve learned after 15 years: the best shag is the one tailored specifically to YOU. Your face shape, hair texture, lifestyle, and personality should all influence your cut.
This is why consultation is so crucial. I spend 15 minutes before every cut discussing exactly what my client wants, needs, and can realistically maintain. The perfect shag considers your natural part, your styling abilities, and even how you sleep.
🎯 BEFORE YOUR APPOINTMENT: Take photos of yourself from multiple angles, note which features you love and which you’d like to soften, and be honest about your styling routine.
Face Shape Guide: Finding Your Perfect Shag Variation
Oval Face (The Universal Winner)
Lucky you—oval faces can wear virtually any shag variation. I recommend emphasizing your natural symmetry with balanced, face-framing layers that highlight your bone structure.
Best choices: Classic feathered shag, curtain bangs shag, sleek blow-dry shag
Round Face (Create Length)
The goal is elongating your face shape. I achieve this with longer, vertical layers and avoiding too much width at the cheeks.
Best choices: Side-swept shag, asymmetrical shag, face-framing layers starting below the cheekbone
⚠️ AVOID: Too much volume at the sides, heavy bangs that shorten the face
Square Face (Soften Angles)
Soften that beautiful strong jawline with gentle, rounded layers that create curves. I love using wispy, textured pieces around the face.
Best choices: Soft layered shag, wispy bangs shag, tousled bedhead shag
Heart-Shaped Face (Balance the Forehead)
Add width at the jawline while minimizing width at the forehead. I focus more volume and layers at chin level and below.
Best choices: Voluminous wavy shag, shag with curtain bangs, tapered ends shag
Long/Oblong Face (Add Width)
Create horizontal volume to balance face length. I use layers that curve outward rather than downward.
Best choices: Voluminous crown shag, bouncy curl shag, choppy textured shag with width at the sides
Hair Texture Guide: Making Your Shag Work With Your Natural Hair
Fine, Thin Hair
This is where strategic layering becomes crucial. Too many layers and you’ll look sparse; too few and you’ll look flat.
The solution: Concentrate layers at the crown for lift, keep more length at the bottom for fullness. Use blunt-cutting techniques on the perimeter to create the illusion of thickness.
💡 VOLUMIZING HACK: Dry shampoo at the roots before styling—it grips the hair and creates instant lift.
Best shag styles: Soft layered shag, hidden layers shag, root-lifted shag
Thick, Coarse Hair
You need weight removal without losing the style’s shape. This is where razoring and point-cutting techniques shine.
The solution: Heavy interior layering to remove bulk, while maintaining length and shape. The disconnected shag works beautifully here.
✨ TAMING SECRET: A small amount of smoothing serum on the ends prevents frizz while maintaining texture.
Best shag styles: Disconnected shag, tapered ends shag, choppy textured shag
Naturally Wavy Hair
Embrace it! Your natural texture is perfect for shaggy styles. The cut should enhance your wave pattern, not fight it.
The solution: Layers cut to follow your natural curl pattern, allowing waves to form beautifully without creating pyramid shape.
Best shag styles: Voluminous wavy shag, air-dried shag, messy-chic shag
Straight Hair
Straight hair showcases shag layers beautifully, but you need texture products to prevent it from looking too sleek or flat.
The solution: Point-cutting and razor techniques create natural texture. Styling with texturizing products gives that piece-y, lived-in look.
Best shag styles: Classic feathered shag, sleek blow-dry shag, modern razored shag
Curly Hair (Loose Curls)
The medium length is ideal for curls—long enough to prevent the “poof,” short enough to stay manageable.
The solution: Layers cut when hair is dry (crucial for curls!) to ensure they fall correctly when styled. Remove weight at the bottom to prevent triangular shape.
⚠️ NEVER: Let someone cut your curly hair wet—the shrinkage will make it much shorter than you wanted.
Best shag styles: Curly shag cut, customized personal shag, graduated layers shag
The Complete Styling Guide: Products & Techniques That Actually Work
Essential Products for Your Shag (From My Professional Kit)
After testing hundreds of products on mature hair, these are the ones I actually recommend:
1. Volumizing Mousse Apply to damp roots before blow-drying. It creates lift without stiffness or crunch. Size of a golf ball for medium-length hair.
2. Texturizing Spray This is your styling best friend. Spray throughout dry hair and scrunch for instant piece-y texture. Transforms limp hair into styled perfection.
3. Light Hold Hairspray Heavy hairspray is aging—it makes hair look stiff and unnatural. Light hold maintains your style while allowing natural movement.
4. Dry Shampoo Not just for cleaning—it’s a styling product that adds grip and volume. Spray at roots, wait 30 seconds, massage in, then style.
5. Smoothing Serum Just a tiny amount on ends prevents frizz and adds shine. For mature hair, choose one with UV protection to prevent color fading.
6. Heat Protectant Spray Non-negotiable if you use hot tools. Mature hair is more fragile and needs protection from heat damage.
💰 BUDGET TIP: Invest in good styling products rather than expensive shampoo. The styling products are what create your daily look.
Step-by-Step Styling: The Professional Method
The 10-Minute Professional Blow-Dry
- Prep damp hair: Apply volumizing mousse to roots, smoothing serum to ends
- Rough dry: Flip head upside down, blast 70% dry with hands scrunching hair
- Section and style: Divide into 4 sections, use round brush to lift roots while blow-drying
- Cool blast: Hit each section with cool air to set the style
- Texture and finish: Spray texturizing spray throughout, scrunch with fingers, finish with light hairspray
The 5-Minute Air-Dry Method
- Apply products to soaking wet hair: Leave-in conditioner, curl-enhancing mousse
- Scrunch repeatedly: Use your hands to scrunch hair toward your scalp, encouraging natural texture
- Plop (optional): Wrap hair in a microfiber towel for 10 minutes to enhance wave
- Let it dry: Don’t touch it while drying—touching creates frizz
- Finish: Once dry, apply tiny amount of serum to ends, gently separate any clumped pieces
⏰ OVERNIGHT STYLING: Sleep with hair in a loose bun on top of your head. Wake up to beautiful, natural waves requiring zero morning effort.
Color Strategies That Enhance Your Shag
The right color placement can make your shag look even more dimensional and expensive. Here’s what I recommend for women over sixty:
Dimensional Highlights
Instead of traditional highlights throughout, I place them strategically in the shortest layers. When those layers move, the highlights flash through, creating beautiful depth.
💡 THE MAGIC RATIO: 60% your base color, 40% highlights creates the most natural, dimensional look.
Face-Framing Lightness
Lighter pieces around the face are incredibly brightening and youthful. I typically go 2-3 shades lighter than the base color right at the hairline.
This technique draws light to your face, making your complexion appear brighter and reducing the appearance of age spots or uneven skin tone.
Lowlights for Depth
Don’t skip lowlights! Adding slightly darker pieces creates shadows that make highlights pop even more. The contrast is what creates dimension.
✨ EXPERT TECHNIQUE: I paint lowlights underneath in the interior layers. You can’t see them directly, but they create depth that makes the overall color look richer.
Root Shadowing
If you’re going lighter overall, root shadowing (keeping roots slightly darker) looks incredibly natural and requires less frequent touch-ups.
For mature women, this technique is practical and flattering—it mimics natural hair color variation and hides regrowth better than solid color.
⚠️ GREY COVERAGE REALITY: If you’re covering grey, ask for semi-permanent color between permanent color appointments. It’s gentler on aging hair and prevents damage.
Common Mistakes to Avoid With Your Shag
Mistake #1: Too Many Layers
More layers doesn’t equal more volume. Too many layers, especially in fine hair, creates gaps and makes hair look thin and stringy.
The fix: Ask for “strategic layering” focused on crown volume and face-framing, with weight maintained at the perimeter.
Mistake #2: Wrong Product Application
Heavy conditioner at roots = flat hair. Styling products on soaking wet hair = diluted effectiveness.
The fix: Condition only mid-length to ends. Apply styling products to towel-dried (damp but not dripping) hair.
Mistake #3: Fighting Your Natural Texture
Trying to make straight hair curly or curly hair straight every single day damages your hair and wastes time.
The fix: Choose a shag variation that works WITH your natural texture. Style it, don’t fight it.
Mistake #4: Neglecting Regular Trims
Shags grow out poorly. The specific layer pattern gets lost, and you end up with shapeless medium hair.
The fix: Schedule appointments every 6-8 weeks. Think of it as maintaining an investment, not an optional expense.
💰 COST BREAKDOWN: One great haircut every 6 weeks ($60-120) versus looking mediocre constantly—the value is obvious.
Mistake #5: Using Hot Tools on High Heat
Mature hair is more fragile. High heat causes irreversible damage that makes styling even harder.
The fix: Use medium heat (300-350°F), always use heat protectant, and give your hair heat-free days whenever possible.
Maintenance Schedule: Keep Your Shag Looking Fresh
Weekly Routine
Sunday evening: Deep conditioning treatment (leave in for 30 minutes)
Mid-week: Clarifying wash to remove product buildup
Daily: Quick refresh with dry shampoo and texturizing spray as needed
Monthly Must-Dos
- Trim any split ends yourself with hair shears (not regular scissors!)
- Evaluate your product routine—swap out anything that’s not working
- Take current photos to show your stylist at next appointment
Every 6-8 Weeks
Professional haircut to maintain shape. This is non-negotiable for shags.
Every 8-12 Weeks
Color service if you’re covering grey or maintaining highlights
✨ SALON TIP: Book your next appointment before leaving the salon. You’ll never forget, and many salons offer discounts for pre-booking.
Special Occasions: Elevated Shag Styling
For Weddings or Formal Events
Add soft curls throughout using a 1.5″ curling iron. Instead of uniform curls, vary the direction—some toward face, some away. This creates romantic, textured waves.
Finish with small decorative pins or a delicate headband for subtle elegance.
For Professional Presentations
Sleek blow-dry with the ends flipped slightly under creates polish. Side part instead of center creates a more professional, less casual look.
Add shine serum for healthy-looking gloss.
For Casual Weekend Style
Embrace the messy-chic vibe. Sleep in a loose braid, wake up and tousle with fingers, add texturizing spray, and you’re done.
This is when your shag truly shines—effortless and undone but completely intentional.
Frequently Asked Questions: Expert Answers
Q: Will a shag make my thin hair look thinner?
Absolutely not—if cut correctly. The layers should create volume and movement that makes hair appear fuller. Ask specifically for “volumizing layers” rather than “thinning layers.”
Q: Can I wear my shag in a ponytail?
Yes! The medium length is perfect for a messy, low ponytail. The shorter layers will create beautiful, face-framing pieces that escape the ponytail naturally.
Q: How long does it take to style daily?
Honestly? 5-10 minutes for casual styling, 15 minutes for polished. That’s the beauty of shags—they look intentional with minimal effort.
Q: I have a cowlick. Will a shag work?
Shags actually work brilliantly with cowlicks! The textured, piece-y nature of the cut disguises irregular growth patterns. Your stylist can incorporate the cowlick into the style direction.
Q: What if I don’t like it?
Quality stylists do consultations first. Bring reference photos, be specific about concerns, and trust the process. That said, hair grows. If you’re truly unhappy, the medium length can be adjusted to something else within a few weeks.
Real Talk: What Women Over 60 Say About Their Shags
I asked my clients to share their honest experiences. Here’s what they told me:
“I spent 40 years with the same boring style because I thought that’s what mature women should do. The shag changed everything. I feel like myself again.” – Margaret, 63
“My granddaughter said I look cool. COOL! At 67! The haircut is easy to manage, and I get compliments everywhere.” – Patricia, 67
“I was nervous about layers with my thin hair, but my stylist knew exactly what she was doing. My hair looks thicker than it has in 20 years.” – Susan, 61
“The best part? I can style it in 10 minutes and it looks like I tried. At our age, that matters.” – Donna, 69
Your Action Plan: Getting The Perfect Shag
Before Your Appointment
- Save 5-7 reference photos showing different angles of shags you love
- Note what specifically appeals to you about each photo
- Consider your daily routine—be honest about styling time you’ll actually invest
- Assess your hair’s current condition—damaged hair needs repair before dramatic cuts
- Choose a stylist who specializes in mature hair—this matters more than you think
During Your Consultation
- Show your photos and explain what you love about each
- Discuss your face shape and which features you’d like to emphasize or soften
- Be honest about styling abilities—there’s no shame in wanting low-maintenance
- Ask for a styling demonstration—watch how your stylist styles it so you can replicate
- Request product recommendations—and actually write them down
After Your Cut
- Take photos immediately so you remember how it looked fresh from the salon
- Practice styling it yourself within 24 hours while the stylist’s technique is fresh in your mind
- Book your next appointment before leaving the salon
- Experiment with different products until you find your perfect combination
- Give it two weeks before deciding if you love it—all new cuts need an adjustment period
🎯 PRO TIP: Record a quick video of your stylist explaining your cut and styling it. Watch it at home when you can’t remember the technique.
Final Thoughts: Embrace The Transformation
Here’s what I want you to remember: age is just a number, but confidence is everything. The right haircut doesn’t just change your appearance—it changes how you carry yourself, how you engage with the world, how you feel when you look in the mirror.
I’ve watched countless women over sixty transform not just their hair, but their entire outlook with the right shag haircut. They stand taller. They smile more. They stop apologizing for taking up space.
Your hair is one of the first things people notice about you. Make it count. Make it reflect who you are right now—vibrant, confident, and absolutely unwilling to fade into the background just because society has some outdated ideas about aging.
The medium shag isn’t just a haircut. It’s a statement that says you’re still evolving, still experimenting, still refusing to be invisible.
Ready to make the cut? Your most confident era is waiting.
💬 SAVE THIS PIN: Tap the save button so you can reference this guide when talking with your stylist!
📌 TAG A FRIEND: Know someone who’d rock a shag? Share this with them!
✨ TRY IT: Book that consultation. You deserve to feel amazing.
Related Articles You’ll Love:
- Best Hair Colors for Women Over 60 That Take Years Off
- 15 Gray Hair Care Secrets Salons Don’t Tell You
- How to Find the Perfect Stylist for Mature Hair
- Low-Maintenance Haircuts That Look High-End
- The Ultimate Guide to Volumizing Products for Aging Hair